Python comes automatically on Linux and Mac systems but with Windows you have to install it. Getting Python on Windows is pretty easy. Here’s some instruction.
Let’s install some Python on Windows
Please note, these instructions are on a Windows 7 system and installing Python version 2.7.x.
1. Download and Install the Python installer
Head over to Python.org and download the installer for the version of Windows you have. After installing you should have a new directory under the C:\ drive called “Python27” (if installing Python 2.7).
2. Make sure the Python directory is in your PATH
This has happened to me a couple times so be sure to verify the Python directory (C:\Python27) made it in your PATH:
- Open your computer properties
- Press the Windows Key + PAUSE/BREAK key together or
- Right-click on Computer and select properties
- Click on Advanced System Settings
- Click the Environment Variables button.
- Under the System variables section locate the Path, click the Edit button with Path selected.
- Add the Python directory to the text box. Be sure to separate the last directory with a semi-colon (;). Example:
;C:\Python27;
- **Since the text field isn’t re-sizable it can be difficult to see what’s being entered here. You can always copy all the text and paste it into Notepad for a better view
- SIDE NOTE – you may need to surround the path in double quotes. For example:
;"C:\Python27";
3. Python it up!
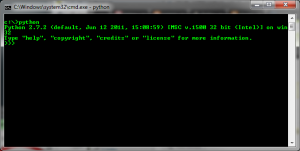
The easiest way to verify Python is installed and ready to go is to open up a command line window and enter the following:
python
This runs the “python.exe” under your C:\Python27 directory. You should see something similar to the following.

Congratulations! You have Python installed and can now do some Python-ing.
To get out of Python just enter quit() or press Ctrl + Z.
4. Write some Python!
Now you can head over to Codeacademy.com, Coursera.org and/or Course Hero and get your learning on.